Thursday, 16 March 2017

Second Landscape

For my second landscape I thought it would be a good thing to be able to see an environment when you exit. This could add to the narrative, depending on the environment I finally add.

At this point I decided to add a desert range which you can see from the outside of the exit door.

To create this I tried two programs.

First I tried World Machine, This automatically generates the world, but I found the heightmaps in the demo version were too low resolution at only 512X512.


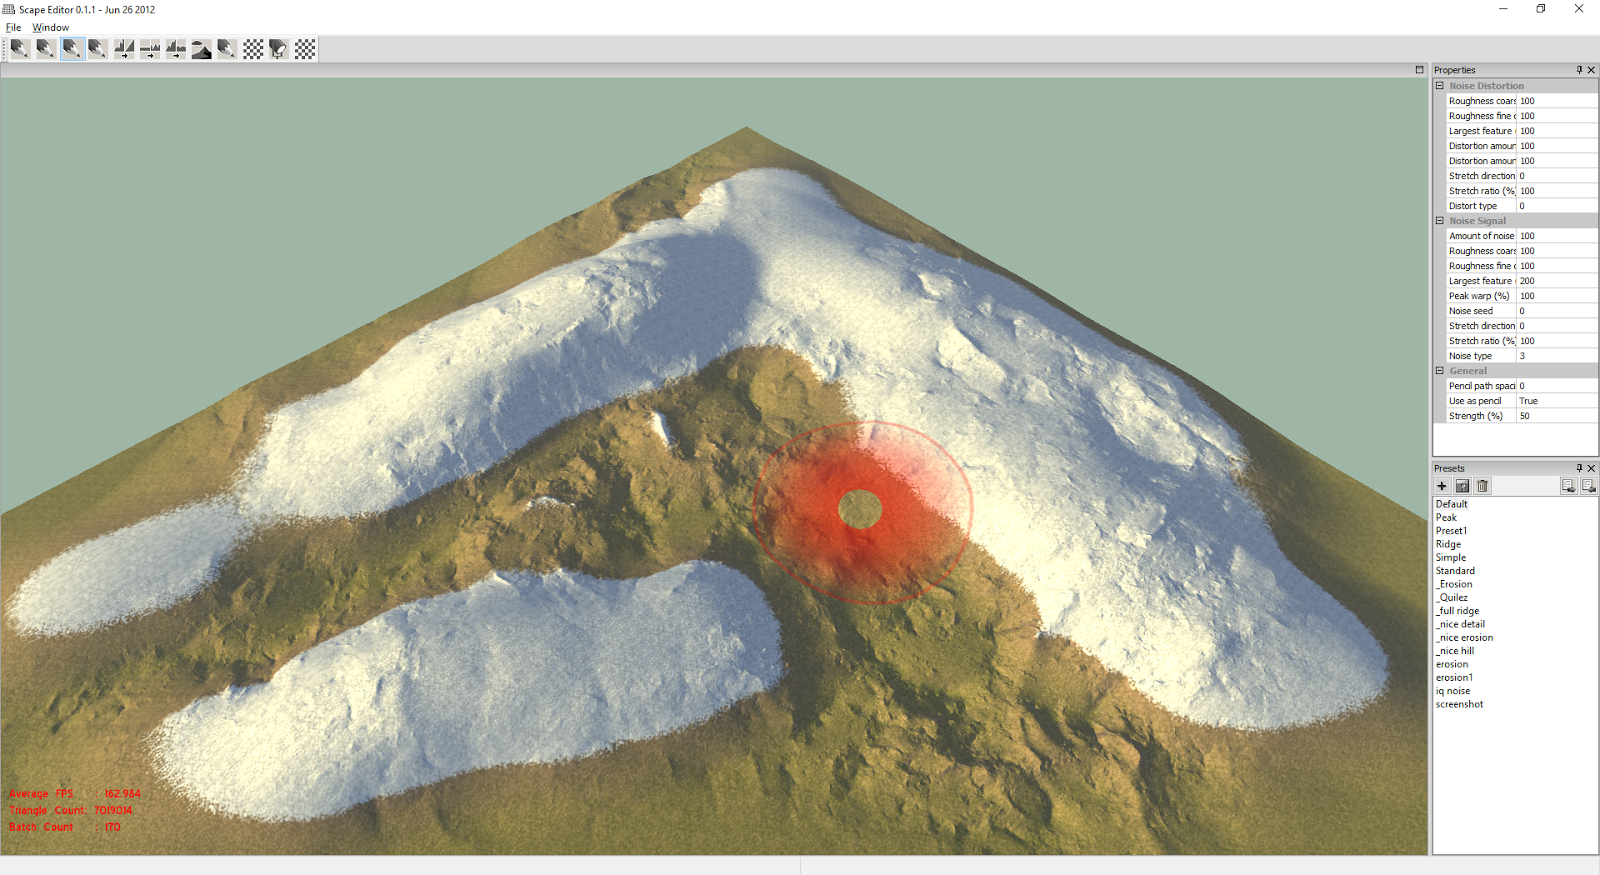
The next program I tried was Scape, a relatively obscure program, but extremely powerful. Although it doesn't produce it's own landscapes, it allows direct sculpting using various brushes and produces 4k Heightmaps. The procedural noise is particularly realistic especially compared to Unreal's equivalent.


I originally wanted the user to be able to walk into the landscape, but I found I couldn't get the right effect, as I wanted the player to be intimidated by large vistas of sand dunes, which didn't work out from the characters point of view when on the same level as the Landscape.

To solve this I have temporarily stopped the player at the exit and used the Landscape at a tilted angle to get the effect I want.

Here's how it looks in game


From the top of the amphitheater


And fully zoomed out


It's kind of a shame how little you can see from the exit area, but I think I will fix that at a later time.

In the end I think I created a pretty high quality heightmap for this landscape. I think for further development I will work on getting the player closer to it while also keeping the desired dune effect.

Modpack creation

For this level, I concluded that I would need at least the following modpack parts to create a viable product for feedback:

Wall Section
Floor Section
Roof Section
Colosseum Section

These parts were created and UV mapped in Maya, then a material applied in Unreal Engine.


And here's how they look in game:


These objects are relatively low poly, with most of the detail coming from the textures. This is due to my focus on game performance over object detail, as I want gameplay to be forefront without being bogged down with high poly meshes, though there is a possibility they could be a little higher detail later down the line.

There's more scenery objects I could add to this basic set, which I will work on as part of future development.

Foliage

As the arena area is sand, there isn't going to be much Foliage.

As seen here, there is just a small amount of grass in loose sand of this type.


Which I have tried to emulate on the level by placing grass foliage in certain areas.


The foliage is part of the Infinity Blade Grasslands pack, and is being used currently as we have not created our own.

To add some extra embellishments, I have also began adding in some vines around the arena walls to show age, though not too many, as the environment is quite desert like, meaning not as many would grow in the hot climate.


Maybe this could suggest that it was at some point a more green place which became desert-like from some kind of disaster or natural phenomena.

First Landscape

The first landscape I am creating is the one for the central arena.

The arena is sand, so will be kind-of uneven, meaning I can use the unreal sculpting tools to create the desired effect.

I created a small terrain in the centre and applied a Sand material to it.

I used the noise brush to add a subtle unevenness to the whole area.


Then, to make it look like the sand had collected at the edges, I used the standard round brush at varying sizes to create piles at the corners and raise it slightly along the edges.


I think this technique was good enough for this effect, it would have been excessive to use a professional terrain generator for this small area of sand.

Technical/Ludic/Narrative/Aesthetic

Understanding Technical, Ludic, Narrative and Aesthetic considerations when creating a 3D environment is very important to the game as a whole.

Aesthetically, my environment consists of a dungeon-like internal environment consisting of stone walls and floors which is dimly lit by fire torches. This is to convey the fact the player has been captured against their will and compel them that the aim is to escape the environment. The final boss battle takes place in a dusty amphitheater, which is meant to be kind of intimidating to the player and convey that this is an important battle.

Wall mounted fire torch

To help with the aesthetics, I am using mainly the following textures: Stone paving slabs for the area outside the arena, large stone chunks for the wall sections, cobbles for the walls and ceiling as well as the arena, and Sand and rock for the arena floor and the external area.

Main aesthetic materials

In a Ludic sense, by definition, the word Ludic is meant to encourage play. My environment is purposefully maze-like to encourage the player to explore and contains many challenges, such as small enemies to attack and, in future developments will contain puzzle elements and world-based hazards. All of these features are present specifically to add to the play experience of the player.

The map for my level is a maze, with branching routes, as you can see below.

Level map maze
The players are invited to explore, but they are also guided. Each floor section will subtly glow green once they have visited an area, allowing the player to find areas they haven't been.

Green guide light
The minion enemies placed throughout the game compel the player to continue exploring.

Spawned minions in the level

The Narrative of the level is the player being trapped against their will in the environment and the experience of reaching the goal, which is to escape the maze-like hallways of the dungeon to reach the final showdown with the boss and escape. While this isn't much of a narrative, it is enough to allow the player to have a goal in mind. The style of the game is kind of like an action RPG dungeon crawl where the main narrative is to reach the end of the dungeon.

The closing doors of the encounter rooms, which only open when the challenge is defeated helps with the Narrative of the level.

Door seen to the right

In a technical sense, and how it relates to level design, I have considered that performance of the game is most important so as not to get in the way of the gameplay. In this sense, most of the environment objects are relatively low poly with most of the detail coming from the textures used. The small minion enemies have very simple AI so as to not burden the CPU.

Low poly floor piece with detail texture

Friday, 27 January 2017

Blockout navigation improvement

In response to some feedback I recieved during the creation process, I have decided to improve the navigation of the level.

The main concern is that players are getting lost because they don't know where they have been.

This probably wont be as much of a problem later down the line when I add set dressing and clutter, but I have created a solution to allow players to see where they have been.

I created a blueprint actor with a trigger box, a light and some code to turn the light on when the player has been in the area.

This shows a subtle green spot on the ground in grid refs the player has already visited.

I populated the map with these objects as shown below:


In the next screenshot you can see how a player has taken an alternative path and exits a corridor not knowing which way to go, but as you can see, the path they have already taken is highlighted, so they know to go the other way!


Thursday, 26 January 2017

Refining blockout and materials

Up to now the walls have been large BSP brushes with a texture applied.

To aid editing down the line, I am going to replace these with mesh wall sections of a standardised size created in Maya so that I can convert them to modpack pieces at a later point.

The other advantage is that I can use one texture one these parts and it won't stretch once I've set the UV tiling correctly. This is not possible on the BSP brush parts as I have used different sized parts for each wall.


First test fit, needs more width.

After adjusting the model, I edited an existing material by making a new copy, then changing the UV parameters with a TexCoord node.


I then went ahead and converted the entire level over to the new wall system.


In the following two shots you can see a before and after of the textures using the BSP and the new mesh walls.


You can see I have also added a cobblestone floor texture to the ground to add to the effect.

This was also edited using the UV TexCoords node in the material editor.